Tripod and Fluid Head Guide: Levelling, Balance and Drag
Short answer
Set up a video tripod in this order: level the head, balance the rig on the plate with counterbalance at zero, then raise the counterbalance until the camera holds at any tilt, then set tilt and pan drag separately. Skipping the plate balance step is why a head can seem to have one setting too weak and the next too strong.
A video tripod is set up in a fixed order and almost everybody does two of the steps backwards. Level first, balance the rig on the plate second, and only then set counterbalance. The Benro S6 PRO Fluid Video Head at around $265 is the head this guide assumes, because six counterbalance steps means the setting can actually be matched to your rig rather than approximated.
Level first, and level properly
Every other adjustment assumes the head is level. A head that is even slightly off level makes a pan drift up or down across the move, which is visible on any horizon and impossible to fix afterwards. It also means the counterbalance is working against a component of gravity it was not set for.
A bowl base levels with one knob in about five seconds: loosen, tip the head until the bubble centres, tighten. A levelling centre column does the same thing more slowly. A flat base head means adjusting individual legs until the head is level, which on uneven ground takes real time and is the reason bowl bases exist.
Set the legs first, roughly, then level. Levelling with a leg is a last resort because it changes the height and can leave one leg carrying more load than the others. Get the height and the footing right, then level with the mechanism.
Balance on the plate, before counterbalance
With counterbalance at zero and the tilt unlocked, the rig should sit level and stay where you leave it. If it noses forward, slide the quick release plate backward. If it falls back, slide it forward. This is physical balance and it has nothing to do with the counterbalance mechanism.
This is the step people skip, and skipping it produces a head that appears to have one counterbalance setting that is too weak and the next one that is too strong. Counterbalance is a spring opposing gravity, and it cannot correct a rig whose mass is in the wrong place. Trying to make it do so wastes the entire feature.
Redo this whenever the rig changes. A different lens, an added matte box or a monitor moved to a new position all shift the balance point, and a plate position that was perfect last week is not perfect now.
Then counterbalance, then drag
Raise the counterbalance step by step until the camera holds at any tilt angle and, when nudged, returns gently rather than snapping. Too little and it noses forward. Too much and it springs back toward level, which is just as unusable and is much less often diagnosed.
Then set the tilt drag, which is fluid resistance rather than a spring. Heavier drag suits a long slow reveal, lighter suits following a person. Set the pan drag separately and usually a little lighter than the tilt, because horizontal moves tend to be faster.
Drag is a shot decision and counterbalance is a rig decision. Counterbalance stays put until the rig changes; drag gets adjusted between shots. Treating them as one control, which is what a cheap head with a single friction knob forces you to do, is why cheap heads produce that small jerk at the start of every pan.
Heads by capacity
$160 to $315. Sized for a light rig, a loaded mirrorless build and a small cinema build respectively.

Benro
Benro S4 PRO Flat Base Fluid Head
8.8 lb capacity with two counterbalance steps on a flat base, which fits the stills tripod you already own.
- Capacity
- 8.8 lb
- Base
- Flat
For a bare body and a small lens.
Check price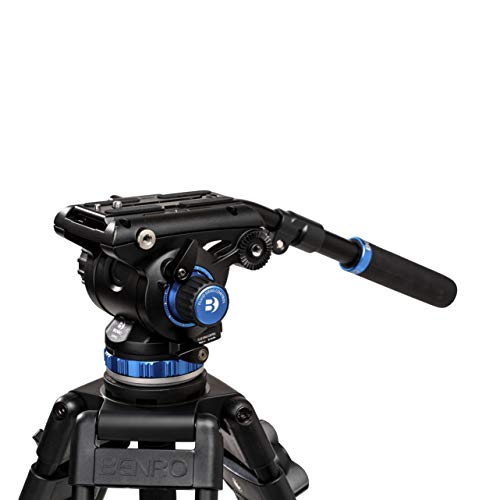
Benro
Benro S6 PRO Fluid Video Head
13.2 lb capacity and six counterbalance steps, enough for a caged mirrorless body with a monitor and a fast zoom.
- Capacity
- 13.2 lb
- Steps
- 6
The value head for a mixed kit.
Check price
Benro
Benro S8 PRO Fluid Video Head
17.6 lb capacity with eight counterbalance steps and a 3/8-16 accessory thread, which covers a cinema body with a matte box and rods.
- Capacity
- 17.6 lb
- Steps
- 8
Buy this if your rig passes 13 lb.
Check priceThe pan bar, which most people set wrong
The pan bar should be long enough that your hand rests on it naturally at the height you will be standing, with your elbow relaxed. Most people leave it at the shipped length, which is short, and then operate with a bent wrist and a tense forearm.
A longer bar also gives you finer control, because the same angular movement at the camera requires a larger hand movement at the end of the bar. That is mechanical advantage and it makes small corrections easier to make smoothly.
Set the angle too. Most bars adjust for both length and the angle they leave the head at, and the right position is the one where your hand falls onto it without reaching. If you are reaching for the pan bar, every move begins with a small correction as you take hold of it.
Setup sequence in full
| Step | What you do | What goes wrong if you skip it |
|---|---|---|
| 1 | Set leg height and footing, column down | A raised column is the least stable configuration |
| 2 | Level the head with the bowl or column | Pans drift up or down across the move |
| 3 | Mount the camera, counterbalance at zero | You cannot feel the true balance point |
| 4 | Slide the plate until the rig sits neutral | Counterbalance appears to have no correct setting |
| 5 | Raise counterbalance until it holds at any tilt | The camera noses down or springs back |
| 6 | Set tilt drag for the shot | Moves start or stop with a jerk |
| 7 | Set pan drag, usually lighter than tilt | Horizontal moves feel sluggish |
| 8 | Set pan bar length and angle | Every move begins with a correction |
| 9 | Hook a sandbag or the leg hook | A knocked leg takes the rig over |
Nine steps sounds like a lot and takes about ninety seconds once it is a habit. Steps four and five are the ones that separate a head that feels weightless from one that fights, and they are the two most often reversed.
Legs, spreaders and footing
Spread the legs fully rather than extending them further and standing them narrow. A wide stance is dramatically more stable than a tall narrow one, and the difference is most obvious when somebody walks past and catches a leg.
Extend the thickest sections first. The lower sections of a tripod leg are the thinnest and least rigid, so a tripod at half height should have the top sections out and the bottom ones retracted, not the reverse. Almost everybody does this backwards because the bottom clamps are closer to hand.
A Sandbag Weight Bags, Four Pack set at around $16 on the spreader or hanging from the centre hook is the cheapest insurance a rig has. Use it indoors as well as outdoors: the most common tripod accident is somebody catching a leg, not wind.
Technique that makes a move look intentional
Start the move before you start rolling and keep moving after you stop, then trim both ends in the edit. That gives you a clean decisive in and out and means a slightly ragged start does not cost the take.
Lead the subject rather than following them. Framing that leaves space in the direction of travel reads as anticipation; framing that chases reads as a reaction. That is a compositional decision made with the pan bar and it is most of what separates a considered move from a corrective one.
Use your whole body. A pan driven from the wrist runs out of range and produces a correction mid-move. A pan driven by turning from the hips with the arm relaxed can run continuously through a wide arc, which is why operators set their feet before a move rather than during it.
Next, from here
- Best fluid heads
Capacity, counterbalance steps and what they cost.
- Best video tripods
Legs, bowls and levelling columns.
- Rig weight calculator
The number your head capacity must cover.
- Rig balance and centre of gravity
Why mounting height changes the setting.
- Best camera sliders
The other thing your head will sit on.
- Narrative starter build
Where sticks matter more than stabilisation.
Common questions
- What order should I set up a video tripod?
- Set the legs and footing with the column down, level the head, mount the camera with counterbalance at zero, slide the plate until the rig sits neutral, raise counterbalance until it holds at any tilt, then set tilt and pan drag separately, then the pan bar, then a sandbag. Steps four and five are the ones most often reversed, and reversing them is why a head seems to have no correct setting.
- Why does my camera nose forward when I release the tilt lock?
- Either the rig is not balanced on the plate, or the counterbalance is set too low. Fix the balance first: with counterbalance at zero, slide the plate until the camera sits neutral and stays where you leave it. Then raise counterbalance step by step until it holds at any angle. Counterbalance is a spring and cannot correct mass that is in the wrong place.
- What is the difference between drag and counterbalance?
- Counterbalance is a spring that opposes gravity so a tilted camera stays put, and it is a rig setting that stays fixed until the rig changes. Drag is fluid resistance that slows a move so pans start and stop smoothly, and it is a shot setting you adjust between takes. Cheap heads combine them into a single friction knob, which is why they jerk at the start of a pan.
- Why does my pan drift up or down?
- The head is not level. A head even slightly off level means a pan traces an arc relative to the horizon, which is visible on any horizontal line and cannot be fixed afterwards. Level with the bowl or levelling column rather than by adjusting a leg, because leg adjustment changes the height and can leave one leg carrying more load than the others.
- Should I extend the top or bottom tripod leg sections first?
- The top ones, because they are the thickest and most rigid. A tripod at half height should have its upper sections extended and lower sections retracted. Almost everybody does the opposite because the bottom clamps are closer to hand, and the result is a tripod standing on its thinnest, most flexible tubes.
- How long should the pan bar be?
- Long enough that your hand falls onto it naturally at your standing height with a relaxed elbow, which is usually longer than the shipped setting. A longer bar also gives finer control, because the same angular movement at the camera needs a larger movement at your hand. If you are reaching for the bar, every move starts with a correction as you take hold.
Totalling your own rig weight against your gimbal payload? The Camera Rig Build Planner is the paid version of these pages: 8 printable worksheets you fill in with your own numbers, plus the full PDF, $29.